
Operating one correctly isn't just theory. Programming errors, workholding mistakes, poor tool selection, and rushed machine setup all chip away at part quality and shop profitability. Many shops now lean on multi-axis milling — 3 to 5-axis — to hit tighter tolerances on increasingly complex geometries.
This guide walks through the real operating sequence of a CNC milling machine, not the textbook version.
TL;DR
- CNC milling cuts parts with a rotating cutter driven by G-code toolpaths from CAD/CAM
- Confirm workholding, tooling, program verification, and work-zero points before every job
- Run this sequence: setup → program load → dry run/first-piece check → production → monitoring → shutdown
- Results hinge on operator discipline: correct feeds/speeds, tool maintenance, and steady monitoring
- Dealer-backed training and support cut costly setup errors and unplanned downtime
When Should You Use a CNC Milling Machine?
CNC milling excels at parts needing flat surfaces, pockets, slots, contours, drilled and tapped holes, or 3D profiles held to tight tolerances. If your part needs precise, repeatable geometry, milling is usually the right call.
Milling gets misapplied when:
- Volumes are extremely high and parts are simple: casting or stamping often wins on unit cost
- Fine-detail cavities in ultra-hard materials are a better fit for EDM
- Near-net shapes only need light finishing, so full milling cycles add cost without value
Shop context matters too. A job shop running one-off or low-volume precision parts (mold and die, aerospace, medical) uses milling very differently than a high-volume production line. Milling is also frequently paired with other processes, like CNC turning, in a single part's production flow.
When the geometry needs multi-sided access, machine class matters as much as process choice. 5-axis milling earns its keep by cutting setups: Haas has documented jobs that needed 4, 5, or even 10 setups on a 3-axis machine falling to 1 or 2 on 5-axis, which cuts handling time and stack-up error.

Choose 5-axis (or 3+2) when you need:
- One-setup access to multiple faces on complex prismatic parts
- Steep or compound angles on large work like airframe components and layup molds
- Fewer refixtures on tight-tolerance features that stack error across setups
What You Need Before Operating a CNC Milling Machine
Before the spindle ever turns, several things need to be locked in.
Program and Setup Fundamentals
- Verified G-code: CAM post-processors generate G-code for your machine, controller, and axis setup. A program built for one control may not run cleanly on another.
- Correct workholding: Vise, fixture, or clamps rated for the material and cutting forces. Haas warns that improperly clamped parts can be ejected at high speeds or feeds — a serious safety issue, not just a quality one.
- Appropriate cutting tools: End mills, face mills, or form cutters matched to material hardness, geometry, and finish. Use the shortest tool that works, and shrink-fit holders above 10,000 rpm to control runout.

Training and Verification
Operator training on the specific machine controller and safety procedures matters more than most shops admit. Improper setup remains one of the most common causes of scrapped parts.
Setup and tooling checks catch most preventable errors when you run them before the cycle starts, not after.
Test cuts are the practical next step before you commit to a new machine or process. WSM Technology's Demonstration Center in Rootstown, Ohio lets shops run test cuts and time studies to prove out a technology before it hits the floor. That is lower risk than discovering mid-production that a fixture or toolpath will not hold up.
How to Operate a CNC Milling Machine (Step-by-Step)
CNC milling follows a defined sequence. Skipping verification steps is the leading cause of scrapped parts and tool breakage.
Setup and Preparation
Secure the workpiece to the worktable, install and index tools into the spindle or tool changer, then set work offsets — the X, Y, Z zero points the machine uses as its reference.
Common setup errors that ruin parts:
- Incorrect offset entry
- Loose fixturing
- Mismatched tool length compensation
Haas specifically flags incorrect tool offsets, incorrect work offsets, and the wrong tool in the spindle as top causes of machine crashes.
Initiating the Program
Load the verified G-code, then run it through graphical simulation or a dry run before cutting real material. Haas machines let operators run programs in Graphics mode with zero physical motion — an easy way to catch a bad toolpath before you scrap material.
Most modern controls require operator confirmation of tool numbers, spindle speed, and feed rate before cutting begins. Watch for these signs the program initiated correctly:
- Smooth rapid traverse with no hesitation or grinding
- Correct spindle direction
- Coolant activation at the programmed point

Operating the Machine Correctly
Once cutting starts, monitor tool engagement closely. Feed override adjustments should stay within tested limits — push too far and you risk tool deflection or outright breakage.
Spindle RPM, feed rate, and depth of cut should all stay within the tool manufacturer's and material's recommended ranges. Those limits control surface finish, dimensional accuracy, and tool life.
Monitoring During the Cut
Your senses are still one of the best diagnostic tools on the floor. Watch and listen for:
- Unusual noise or chatter marks on the part
- Chip color and formation
- Coolant flow consistency
- Rising spindle load
Inconsistent chip formation or a climbing spindle load often signals tool wear or wrong feeds/speeds — adjust feeds, speeds, or replace the tool before the next pass.

Shutting Down or Completing the Cycle
Retract the tool, stop the spindle, and safely remove the finished part before starting the next cycle. Haas requires the spindle to fully stop before the enclosure doors open — a required safety interlock.
Skipping cool-down or chip-clearing procedures accelerates wear on ball screws, guideways, and spindle bearings. Clear chips and let the spindle cool so those components last longer between service intervals.
Best Practices for Reliable CNC Milling Operation
A few habits separate shops that run smoothly from shops that fight fires all week.
- Run first-piece inspection on every new program before full production. It catches program or fixture errors while they're still cheap to fix
- Track tool life consistently so cutters get replaced before they cause dimensional drift or a poor finish, not after
- Schedule calibration and lubrication of ball screws and guideways to preserve positioning accuracy over the life of the machine
- Invest in ongoing operator training. Proficiency in troubleshooting and tool selection typically builds over months and years, not days
Regular maintenance is cheap insurance. Haas's own VMC maintenance schedule is a solid benchmark:
- Daily: door-interlock checks
- Monthly: axis oil and ball screw lubrication
- Every six months: hoses, coolant tanks, and probe calibration

Skipping these on the assumption "it's still running fine" is how minor issues become spindle rebuilds.
WSM Technology's local training programs across Ohio, Pennsylvania, and West Virginia give shops a resource for building that operator proficiency and running time studies to spot where a process is losing time.
Frequently Asked Questions
What is a CNC milling operation?
CNC milling is a subtractive process where a computer-controlled rotating cutter removes material from a workpiece along a programmed toolpath to create a specific shape or feature.
What are the 7 major parts of a CNC machine?
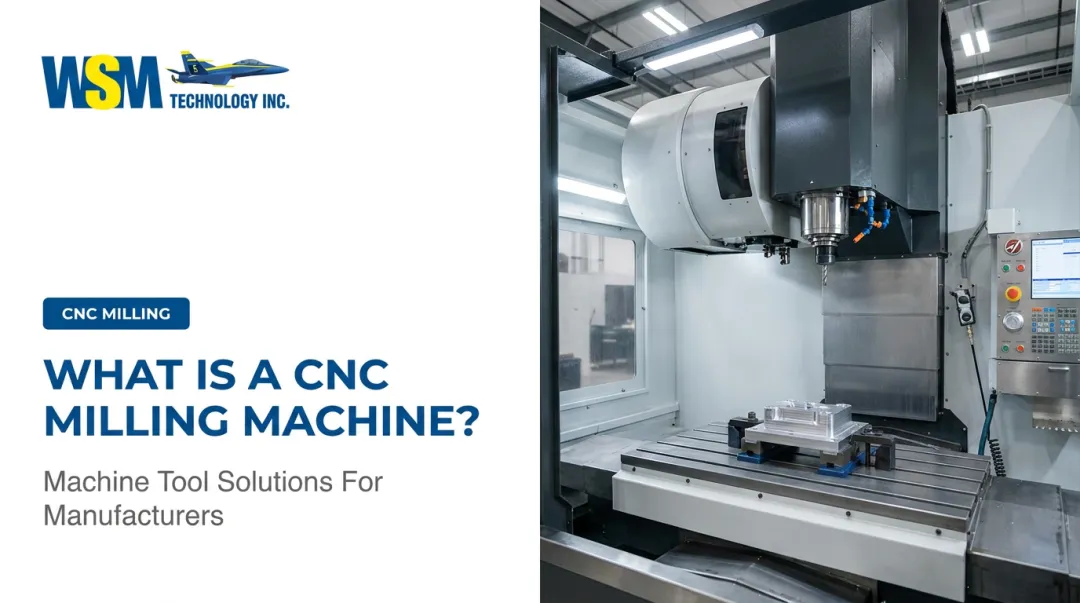
The core components are the spindle, worktable, controller, ball screws/drive system, tool changer, machine bed/frame, and coolant system. Each plays a distinct role in accuracy and repeatability.
How long does it take to learn to operate a CNC milling machine?
Basic operation can be picked up in weeks. Real proficiency in programming, tool selection, and troubleshooting typically takes months to a few years of hands-on shop time.
What is the difference between 3-axis and 5-axis CNC milling?
3-axis mills move only in X, Y, and Z. 5-axis machines add two rotational axes, letting the tool reach complex geometries in a single setup instead of repositioning the part multiple times.
How often should a CNC milling machine be maintained?
Daily cleaning and lubrication checks are standard, with more thorough calibration typically scheduled quarterly or per the manufacturer's guidance. Always follow the machine builder's published maintenance intervals for your specific model.
Can CNC milling machines run unattended?
Once programmed and set up correctly, they can run largely unattended. Periodic checks are still smart practice—they catch tool wear or emerging errors before a part is scrapped.