
The good news: most failures follow predictable patterns. Wire breaks, surface finish problems, slow cutting speeds, dimensional errors, and control axis faults each leave recognizable symptoms before they cause serious downtime.
This guide covers the five most common Mitsubishi Wire EDM problems, their root causes, and actionable fixes — along with clear guidance on when to troubleshoot yourself and when to call a qualified service technician.
Key Takeaways
- Wire breaks, poor surface finish, slow cutting, dimensional errors, and UV axis alarms cause most Mitsubishi Wire EDM downtime
- Most problems trace back to worn consumables, degraded dielectric water, or incorrect process parameters
- Operator-resolvable fixes handle most issues; recurring mechanical or control-level faults require professional service
- Consistent maintenance of guides, power feed contacts, and dielectric quality prevents most failures before they start
What Is Mitsubishi Wire EDM?
Wire EDM (Wire Electrical Discharge Machining) is a non-contact thermoelectric process that removes material through repetitive electric sparks between a continuously fed wire electrode and the workpiece. Dielectric fluid flushes eroded debris from the spark gap throughout the cut.
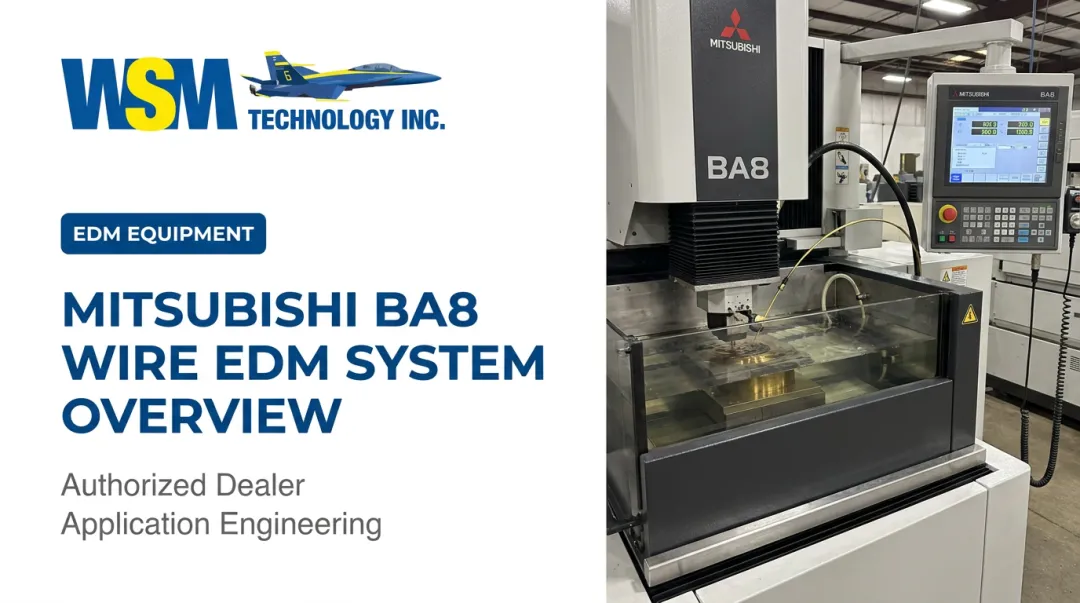
Mitsubishi's MV Series (including the MV1200-R, MV1200-S, MV2400-R, and MV2400-S) and FA Series machines integrate multi-axis CNC control across X, Y, U, and V axes, automatic wire threading, and real-time adaptive discharge control systems including Corner Master 3 and Digital-AE 2.
That complexity means a fault in one layer can mimic symptoms from another. Effective troubleshooting depends on knowing which of the four root-cause categories to examine first:
- Mechanical components (guides, wire drive, tensioning)
- Electrical parameters (discharge settings, pulse conditions)
- Dielectric fluid quality (conductivity, contamination, flow rate)
- Control software (CNC settings, adaptive control configuration)

Jumping to the wrong layer costs time. A systematic approach eliminates each category in sequence.
Common Mitsubishi Wire EDM Problems
Most failures produce recognizable symptoms before causing a full machine stoppage. A 15-minute adjustment at the first sign of trouble beats a half-day recovery after something breaks.
The five problems below cover the vast majority of unplanned downtime on Mitsubishi FA and MV Series machines.
Problem 1: Frequent Wire Breaks
Symptoms: Wire snapping repeatedly during cutting, particularly near the conductive block, upper/lower guide area, or mid-cut on tall workpieces.
Research from Cutting Tool Engineering identifies the primary causes clearly: worn wire guides or power feed contacts cause erratic cutting and wire breaks; excessive tension increases breakage risk because critical flaw size is a direct function of applied tension; and inadequate flushing allows conductive debris to accumulate in the gap, promoting high-energy arcs that weaken the wire.
Common causes at a glance:
- Worn or contaminated power feed contacts/conductive blocks
- Guide wire parts fouled with machining debris
- Dielectric water conductivity outside specification
- Discharge energy (P and I values) set too aggressively for the material
- Wire tension too high, especially during taper cuts
Problem 2: Poor Surface Finish and Surface Line Defects
Symptoms: Visible striations, burn marks, or uneven surface texture on cut faces; workpiece fails roughness spec after final skim passes.
ScienceDirect surface quality research shows that higher peak current and longer pulse duration create larger craters and rougher surfaces. Canadian Metalworking has also documented that a worn lower-head bearing can produce faint lines on multi-skimmed parts.
Common causes:
- Severely worn conductive block or guide wire components
- Dirty or degraded dielectric fluid (discolored, turbid, or odorous)
- Unstable wire tension or transport speed
- Process parameters mismatched to workpiece material or thickness
- Damaged nozzle caps reducing flush pressure consistency
Problem 3: Slow Cutting Speed / Reduced Machining Efficiency
Symptoms: Cut times significantly longer than expected; machine frequently backing off or pausing mid-cut; servo instability on the gap voltage display.
Nozzle position is often the first place to check. Mitsubishi MV documentation confirms machining speed improves under nozzle-closing conditions — when nozzles aren't flush against the workpiece, flushing pressure drops and the control compensates by reducing spark energy, slowing the cut.
Common causes:
- Nozzles not flush against the workpiece surface (open-cut conditions)
- Incorrect TEC file or parameter set loaded for the material/thickness
- ACO (Automatic Cut Optimization) active during already-stable cutting
- Contaminated lower guide seat reducing flushing efficiency
Problem 4: Dimensional Inaccuracy and Shape Errors
Symptoms: Finished part dimensions outside tolerance; corner radii overcut or collapsed; taper on nominally straight cuts; concave or convex profiles on cut faces.
Wire lag at corners is a well-documented root cause. A 2025 MDPI study on corner and shape accuracy in WEDM found that G-code compensation based on a wire-lag model can substantially reduce corner inaccuracy. Mitsubishi addresses this at the control level with Corner Master 3 and Angle Master ADVANCE — but only when those features are correctly enabled.
Common causes:
- Corner strategy parameters not enabled for tight-tolerance geometry
- Wire alignment not re-verified after setup changes or power interruptions
- Incorrect wire tension or transport speed
- External vibration affecting machine positional stability
- Workpiece deformation from internal stress release during cutting
Problem 5: Control and Axis Errors (UV Origin Not Set)
Symptoms: Machine displays a UV Origin alarm; machine refuses to start program execution; reference indicators appear on the U or V axis position display.
The U and V axes control the upper wire guide offset for taper cutting. When these axes are displaced — by an accidental pendant jog, a power interruption, or an emergency stop without a proper axis park sequence — the control requires all four axes to return to reference before allowing program start. This is a safety interlock, not a malfunction.
Common causes:
- Accidental U/V axis jog via pendant during setup
- Power interruption or emergency stop without proper axis park sequence
- Axes not returned to reference position before program start
- Missing or skipped homing routine after machine restart
How to Troubleshoot and Fix These Issues
Before adjusting anything, confirm the exact problem. Note when and where the failure occurs: at startup, mid-cut, or during skim passes. Then check active alarm codes and review gap voltage and current waveforms on the control display. Fixing symptoms without confirming root cause leads to repeat failures.
Fixing Wire Breaks
Work through these steps in order:
- Inspect power feed contacts — rotate or replace if visible grooving is present; clean upper and lower guide wire parts of debris
- Check dielectric water conductivity — replace ion exchange resin if conductivity has climbed above the machine's specified range
- Reduce discharge P and I values incrementally until cutting stabilizes
- Lower wire tension for taper cutting operations specifically — consult the Mitsubishi MV Series manual for the correct tension values for your wire diameter
- Check the take-up wheel — if breaks occur at the waste wire bucket, verify the pressure ratio (approximately 1:1.5 is standard) and confirm waste wire is not contacting grounded surfaces

Fixing Surface Finish and Cutting Speed Problems
To improve surface finish:
- Replace or rotate worn conductive blocks
- Clean the dielectric tank and replace filter cartridges if fluid is discolored or has unusual odor
- Verify upper and lower nozzle caps are undamaged and flush pressure meets specification
- For persistent fringes after skim passes, consult Mitsubishi process documentation for Smode and UHP parameter adjustments specific to your material
To recover cutting speed:
- Reposition nozzles to within approximately 0.1 mm of the workpiece surface whenever possible
- Verify the correct TEC file is loaded for the material type and workpiece thickness
- Consider disabling ACO during stable straight-cut operations
- Inspect and clean the lower guide wire seat if main-cut efficiency has declined without obvious cause
Fixing Dimensional Errors and Shape Problems
- Re-run wire alignment after any setup change or power interruption — this re-establishes accurate wire verticality before production cutting
- Enable corner strategy parameters in the TEC file for workpieces with tight-tolerance corners; Corner Master 3 on MV Series machines handles this automatically when correctly configured
- Apply a stress-relief pre-cut pass with increased offset for parts prone to stress-induced deformation before the final main cut
- Verify no axis or arm collision has occurred that could have shifted mechanical accuracy
Fixing UV Origin Axis Errors
To clear a UV Origin alarm:
- Switch to JOG mode on the pendant
- Select the U axis and jog it to zero reference position
- Repeat for the V axis
- Confirm reference indicators have cleared from the position display
For precision taper work, run the full wire alignment routine from the main menu instead. This automatically squares the wire and establishes the reference position for all axes simultaneously. Validate the fix by running a short straight-cut program before resuming production.
Prevention tips:
- Always return all four axes (X, Y, U, V) to reference positions before powering down
- Switch the pendant to REMOTE mode when not actively jogging to prevent accidental U/V axis displacement
When to Call a Mitsubishi EDM Expert
Many of the fixes above involve consumables designed for operator replacement. Delaying them is the leading cause of cascading problems that appear complex but are actually straightforward maintenance issues.
Operator-replaceable at regular intervals:
- Power feed contacts/conductive blocks — inspect every 80 to 100 hours, replace when visible grooving appears
- Dielectric filters — check filter media every 250 operational hours (life varies from 100 to 1,000 hours depending on material; aluminum cuts filter life significantly)
- Diamond or sapphire wire guides — remove and inspect for concentricity every 2,000 hours or semi-annually
- Ion exchange resin — replace when the system can no longer maintain water conductivity within the target range

WSM Technology, as the official MC Machinery/Mitsubishi dealer for Northern Ohio, Western Pennsylvania, and West Virginia, supplies OEM replacement consumables — wire, filters, and resin tanks — directly through their CPG Department. No minimum order quantity is required.
Escalate to a qualified service technician when:
- Alarm codes persist after completing the standard resolution procedure
- Mechanical accuracy has shifted after a suspected axis collision
- The servo drive, power supply module, or CNC control hardware is suspected
- The machine chronically underperforms despite correct consumable replacement and parameter settings
Consider machine replacement when:
- Repair costs exceed 50–60% of the machine's current replacement value
- The control system is obsolete and parts are unavailable
- Production demands have outgrown the machine's axis travel or accuracy class
WSM Technology's demonstration center in Rootstown, Ohio has a Mitsubishi MV1200S available for test cuts. Schedule a test cut to get actual cycle times and accuracy data from a current machine before making a capital decision.
Preventive Maintenance Best Practices
A documented maintenance schedule eliminates most of the problems covered in this guide. Here is a practical framework:
| Frequency | Task |
|---|---|
| Daily | Check dielectric water conductivity and fluid clarity |
| Weekly | Clean guide wire parts, conductive blocks, and nozzle caps |
| Monthly | Verify wire tension calibration and take-up wheel pressure |
| Every 80–100 hours | Inspect and rotate or replace power feed contacts |
| Every 250 hours | Check filter media condition |
| Every 2,000 hours | Remove and inspect wire guides for concentricity |
| As needed | Replace ion exchange resin when conductivity drifts outside spec |
Two operational habits prevent more recurring problems than any single maintenance task:
- Always park all four axes (X, Y, U, V) at reference positions before powering down
- Keep the pendant in REMOTE mode when not actively jogging to prevent accidental U/V displacement
Most wire EDM problems — particularly UV axis errors, incorrect TEC file selection, and corner parameter omissions — are setup errors that proper training eliminates. Investing in operator training removes these issues before they cost you production time.
WSM Technology offers both local training and advanced training at their Rootstown facility. Founder Blaise Buholzer spent years as an Application Engineer and Trainer at Charmilles, so the curriculum goes well beyond the manual — covering the practical, field-tested techniques that actually get machines running at their best.
Frequently Asked Questions
What does wire EDM mean?
Wire EDM (Wire Electrical Discharge Machining) is a precision manufacturing process that uses a thin, electrically charged wire to cut conductive materials through controlled spark erosion — without mechanical contact. It enables tight tolerances on hardened metals that cannot be cut conventionally.
What is Mitsubishi EDM?
Mitsubishi EDM refers to the Wire and Die-Sinking EDM machines manufactured by Mitsubishi Electric and sold through MC Machinery Systems in North America. The FA and MV Series are the primary wire EDM lines, recognized for high accuracy, automated wire threading, and adaptive control systems.
Why can't you reuse EDM wire?
Each spark erodes micro-pits into the wire surface, thinning and weakening it progressively. Reusing wire produces inconsistent kerf width, higher break risk, and dimensional inaccuracies that compromise part tolerances.
What causes frequent wire breaks on a Mitsubishi wire EDM?
The most common causes are worn or contaminated power feed contacts, dielectric water conductivity above the specified limit, discharge energy parameters set too high for the material, and excessive wire tension. Addressing these in order resolves the majority of wire break incidents.
How often should wire guides and power feed contacts be replaced?
Inspect power feed contacts every 80–100 hours and replace when visible grooving appears; wire guides require a concentricity check every 2,000 hours or semi-annually. Consult your Mitsubishi MV or FA Series maintenance manual for intervals specific to your model and wire diameter.
What does poor surface finish on a Mitsubishi wire EDM indicate?
Poor surface finish typically points to worn conductive blocks or guides, degraded dielectric fluid, unstable wire transport, or process parameters not matched to the workpiece material. Checking each in that order will isolate the root cause efficiently.