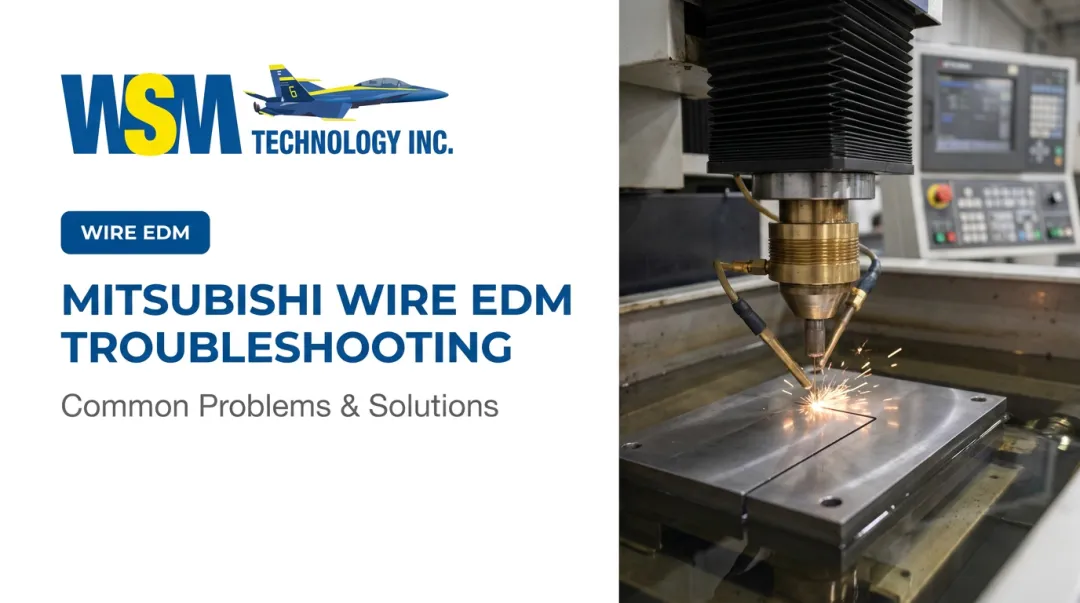

This guide covers the most common Mitsubishi Wire EDM alarm categories, what causes them, and how to troubleshoot them systematically. Whether you're running a current-generation MV-series machine with the M800 control or an older unit in the field, the diagnostic logic is the same: read the alarm, identify the category, inspect the right system, then fix the confirmed cause.
Key Takeaways
- Mitsubishi Wire EDM alarms fall into five categories: wire/threading, dielectric, servo/axis, power supply/discharge, and program/control
- Most alarms can be resolved in-house when you correctly identify the root cause before resetting
- Recurring alarms after reset point to an unresolved mechanical or electrical condition, not a software glitch
- Consumable wear (power feed contacts, wire guides, filters) causes most avoidable alarms
- Alarms involving servo drives, power supply cards, or physical damage require a certified technician
Understanding Mitsubishi Wire EDM Alarm Codes
Mitsubishi Wire EDM machines — including the MV-series with M800 ADVANCE controls and older FA-series and FX-series units — communicate faults through alphanumeric alarm codes displayed on the control panel, typically paired with a short description of the fault condition.
Hard Alarms vs. Warnings
Not all alarms are equal. Understanding this distinction saves time:
- Hard alarms halt the machine immediately and require a full reset (and often a power cycle) after the fault is corrected
- Warning alarms allow the machine to continue running in a degraded state, but ignoring them risks a hard stop or component damage shortly after
- Sub-codes often accompany the primary alarm code and provide additional context about which axis, circuit, or subsystem triggered the fault

The FA Advance series control includes a built-in alarm guide and status recording function, with machine diagnosis, filter pressure monitoring, and maintenance tracking accessible directly from the W31 ADVANCE control panel. Full hardware specs are documented in the MV Series catalog.
Alarm code definitions vary between control generations, so always cross-reference your machine's maintenance manual for exact code-to-fault mappings. The Mitsubishi FA documentation portal is the authoritative source for control-specific documentation.
The Five Alarm Categories and What They Mean
While dozens of specific codes exist, the vast majority of unplanned stoppages in everyday Wire EDM operation trace back to one of five categories.
Wire Break and Auto-Threading Alarms
Wire break alarms trigger when the control detects the wire has snapped during a cut. Research published in the ASME Journal of Manufacturing Science and Engineering identifies the key contributors: wire electrode erosion, thermal and mechanical stress from discharge events, debris accumulation in the kerf, and inadequate flushing.
Common causes in shop practice:
- Worn power feed contacts — uneven current delivery creates hot spots on the wire
- Incorrect wire tension for the material thickness being cut
- Insufficient flushing pressure — debris stays in the cut zone and causes secondary arcing
- Sharp corner geometry — flushing pressure drops as the wire changes direction, increasing break risk
Auto-threading failure alarms (where the machine can't re-thread after a break) have a slightly different root cause profile: clogged threading jets, misaligned guides, or low water pressure at the threading nozzle.
Repeated wire breaks at the same program location point to a geometry or settings issue, not a worn component.
Dielectric (Water System) Alarms
Dielectric alarms cover low water level, out-of-range conductivity, and high water temperature. Conductivity alarms are the most common — deionized water that drifts outside specification (either too contaminated or over-filtered) directly affects spark gap stability and surface finish.
Quick checks by alarm type:
| Alarm Type | First Check |
|---|---|
| Low water level | Tank gauge — check for leaks or evaporation |
| Conductivity out of range | Control's built-in conductivity meter |
| High water temperature | Chiller unit operation and ambient temperature |
Mitsubishi guidance, reported by Canadian Metalworking, recommends cleaning the conductivity sensor every second filter change — a fouled sensor gives false readings and triggers alarms that don't reflect the actual water condition.
Servo and Axis Alarms
Servo alarms appear when the control detects an axis isn't following the commanded path within the allowed tolerance. Typical codes include position deviation errors and overload alarms.
Because EDM is a non-contact process with no cutting forces on the axes, a servo alarm almost always signals a mechanical or electrical fault — not a load issue.
Likely causes:
- Accumulated debris causing axis binding
- Degraded ballscrew lubrication (the MV Series includes an auto-oiler for X/Y axis drive systems)
- Loose or contaminated encoder connectors
- Servo amplifier LED showing a fault state
Power Supply and Discharge Alarms
Power supply alarms — undervoltage, overcurrent, DC bus faults — and discharge-related alarms indicate a fault in the spark generation circuit. The Mitsubishi FA Advance control includes a 30-second short-circuit stop safety feature that activates automatically when a sustained short-circuit condition is detected.
Common causes:
- Power feed contact wear causing abnormal arc conditions
- Dielectric water outside specification reducing insulation effectiveness
- Power supply card degradation on older machines
- Debris in the gap causing repeated short-circuit states
Program and Control Alarms
Program alarms cover memory errors, parameter errors, and program format faults. These typically stem from:
- Corrupted program files or parameter loss from backup battery failure — a dead battery causes SRAM data loss on older controls, and is one of the most overlooked causes of a machine "forgetting" its settings after a power interruption
- Incorrect post-processor output for the specific control generation
- Operator entry errors in parameters or offsets
Root Causes Behind Recurring Alarms
The single biggest mistake operators make is resetting an alarm without investigating what triggered it. The machine clears, runs a few cycles, then alarms again — and the underlying problem has been progressing the whole time.
Most recurring alarms trace back to three root causes:
- Consumable wear — power feed contacts, wire guides, and filters have defined service lives. Running them past their effective life is the most common source of avoidable alarms
- Maintenance gaps — dirty flush nozzles, degraded DI water, dried lubrication, and fouled conductivity sensors
- Undocumented parameter changes — settings adjusted without notes, creating conditions the original calibration didn't account for

Wire EDM accelerates component wear faster than most machine types. Constant water exposure, fine metallic particle contamination, and high-frequency discharge cycles all degrade components that directly affect alarm frequency. Wire contacts, DI resin, filters, and guides deplete faster as machining rates increase — a well-documented characteristic of the process.
NIST manufacturing maintenance data puts the broader cost in context: U.S. manufacturers relying heavily on reactive maintenance experience 3.3 times more downtime than those using structured maintenance strategies. For Wire EDM shops, where unplanned stops interrupt tight-tolerance jobs, the cost of that gap compounds quickly.
That's why individual components matter beyond the alarm they trigger. A worn wire guide causes inaccurate cuts, scrapped parts, and eventually damage to the upper or lower head assembly — repairs that cost far more than replacing the guide on schedule.
How to Troubleshoot Mitsubishi Wire EDM Alarms: Step-by-Step
Step 1: Read and Record the Full Alarm Information
Before pressing reset, write down:
- The exact alarm code
- The alarm description text
- Any sub-code or axis identifier
- What the machine was doing when the alarm appeared (auto-threading, mid-cut, startup, idle)
That last point matters. An alarm that appears only during threading points to a different system than one that appears mid-cut at a specific program location. That context is exactly what Step 2 uses.
Step 2: Classify the Alarm Category
Match the alarm to one of these five categories before touching anything on the machine. This determines which system to inspect and prevents unnecessary disassembly of unrelated components:
- Wire and threading alarms
- Dielectric system alarms
- Servo and axis alarms
- Power supply and generator alarms
- Control and parameter alarms
Step 3: Inspect the Most Probable Physical Cause
Wire/threading alarms:
- Check power feed contacts for wear grooves — uneven wear groove depth is a reliable indicator of contact replacement time
- Inspect upper and lower guides for contamination, cracking, or erosion
- Verify flushing pressure at the nozzles and check for clogged or misaligned nozzle tips
Dielectric alarms:
- Check tank water level against the sight gauge
- Test conductivity against the machine's specification using the control's built-in meter
- Check filter differential pressure and inspect resin condition
Servo alarms:
- With the machine powered off and locked out, check the affected axis by hand for binding or rough movement
- Inspect encoder cable connectors for looseness, corrosion, or contamination
- Check the servo amplifier LED status indicators before assuming a drive fault
Power supply alarms:
- Check incoming power quality first
- Inspect power feed contact condition — degraded contacts are a frequent contributor to abnormal arc conditions
- Do not open the power supply unit unless you are trained to do so safely
Step 4: Fix, Reset, and Validate
Match the fix to the confirmed cause:
- Consumable wear → inspect and replace (guides, contacts, filters)
- Electrical faults → address root condition, then reset; some servo and power alarms require a full power cycle after repair
- Parameter/control issues → restore from backup or correct the specific parameter
After any repair, run a test cycle and monitor for alarm recurrence before returning the machine to production. One clean cycle isn't enough — validate through at least 2-3 complete parts under normal cutting conditions before releasing the machine back to production work.
When to Handle It In-House vs. Contact Your Mitsubishi EDM Dealer
Trained operators should handle:
- Consumable replacements (wire guides, power feed contacts, resin filters)
- Dielectric water maintenance and conductivity correction
- Wire break settings adjustments
- Simple parameter corrections with proper documentation
Call a certified technician when:
- A servo drive or amplifier fault persists after parameter reload and mechanical inspection
- A power supply card failure is suspected
- The same alarm returns repeatedly with no identifiable mechanical cause
- You notice burning smells, physical damage, or heat discoloration on any component
- The fault involves safety interlocks or electrical isolation systems
If any of those conditions apply, it's time to bring in a specialist. WSM Technology is the authorized Mitsubishi EDM dealer for Northern Ohio, Western Pennsylvania, and West Virginia. The team provides on-site service, OEM Mitsubishi EDM consumables (wire, filters, resin tanks), and application engineering backed by decades of hands-on EDM experience — founder Blaise Buholzer has worked with wire EDM machines since his time at Charmilles in Switzerland in the late 1970s.
To request service:
- Northern Ohio: (330) 962-8308 | sales@wsmtechnology.com
- Western PA & WV: Phil Warlop Jr. — (412) 770-5849
Preventive Maintenance to Reduce Alarm Frequency
Most Wire EDM alarms are preventable. A consistent maintenance schedule — not a reactive one — is what separates shops with high uptime from those constantly troubleshooting.
Core maintenance tasks:
- Power feed contacts and wire guides — inspect on a regular cycle based on run hours; worn contacts are the single most common source of avoidable wire break and discharge alarms
- Power feed and ground cables — replace every five years per Mitsubishi guidance to maintain current delivery at original performance levels
- Deionized water conductivity — check regularly against the machine's specified range; replace resin filters before saturation, not after a conductivity alarm appears
- Flush nozzles — keep clean and properly aligned; partially blocked nozzles degrade flushing and increase wire break risk
- Lubrication — keep the axis lubrication system topped off; the MV Series auto-oiler needs to be maintained, not left to run unverified
- Parameter and program backups — back up to external storage before any planned maintenance shutdown and after any parameter changes

Operator training is one of the highest-leverage maintenance investments a shop can make. WSM Technology offers local and advanced training programs for Mitsubishi Wire EDM machines, covering machine setup, consumable management, and operational best practices. Hands-on training and test cuts are available at the demonstration center in Rootstown, Ohio — a practical option for shops looking to reduce alarm frequency before problems become unplanned downtime.
Frequently Asked Questions
How do I clear an alarm on a Mitsubishi Wire EDM?
Resolve the underlying fault condition first — pressing reset without addressing the cause will either immediately retrigger the alarm or fail to clear it at all. Some alarms, particularly servo and power supply faults, require a full machine power cycle after the repair is completed before the control will accept the reset.
What causes a wire break alarm on a Mitsubishi Wire EDM?
The most common causes are worn power feed contacts (uneven current delivery), incorrect wire tension for the material and thickness, insufficient flushing pressure, and sharp corner geometry in the program without appropriate feed rate adjustments. If breaks are occurring at the same location every cycle, it's almost certainly a settings or geometry issue.
What does a water conductivity alarm mean on a Mitsubishi EDM?
The deionized water is outside the machine's specified conductivity range — either too high (contaminated) or too low (over-filtered). Check the resin filter and conductivity sensor for fouling, replace the resin or refresh the water supply as needed, then confirm conductivity is back within spec before resuming.
Why does my Mitsubishi Wire EDM keep showing the same alarm after reset?
The machine is correctly detecting an ongoing fault condition — the root cause hasn't been addressed. Continuing to reset without investigation accelerates wear on whatever component is failing. Follow the structured inspection process for the relevant alarm category rather than repeating the reset cycle.
How do I troubleshoot a servo alarm on a Mitsubishi Wire EDM?
Begin with mechanical checks: jog the affected axis to feel for binding, inspect encoder cables and connectors for damage, and verify axis lubrication. Check the servo amplifier's LED status indicators on the drive. Only escalate to a suspected drive fault after those checks come back clean.
When should I call a Mitsubishi EDM service technician instead of troubleshooting myself?
Call a technician if the alarm persists after a confirmed repair, if the fault involves power supply or servo drive internals, if there's physical damage or burning on any component, or if you're unsure about the safety implications. Power supply cards and servo amplifier internals require proper training — don't attempt those repairs without it.